<< Main Manual 

The Network Builder Interactive Script

NeuronetExperimenter comes with an interactive Network Builder script (called 'nne_networkBuilder'). This program implements much of the same functionality that can be used by the more atomic scripts (see Utility Scripts). However, the script is simpler to use for many operations.

Typing 
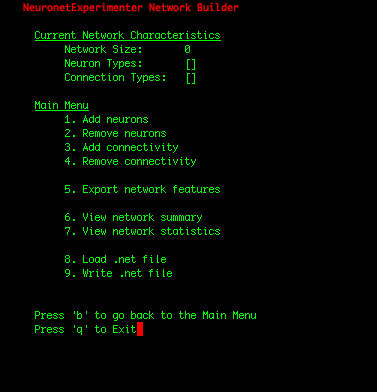
'nne_networkBuilder' at the command-line will start the program and results in a screen like this:

main_menu 

The "Current Network Characteristics" section summarizes the basic information associated with the current network being modified, while the bottom section (here, the "Main Menu") provides various operations that can be performed on the network.

The "Add neurons" section allows you to add neurons that were compiled into the most recent build of NeuronetExperimenter. The "Remove neurons" menu allows you to remove neurons from the currently manipulated network. As shown in the example below, the "Add connectivity" menu allows you to specify all-to-all connectivity for the network, a connectivity scheme using an adjcency matrix, or connectivity between different neuron types with a wiring probability. The "Remove connectivity" option currently only allows removing all the connections from all the neurons within the network.

The "Export network features" option allows you to dump out an adjacency matrix for each connection type from the currently manipulated network. It also allows you to dump out a network summary or network statistics to text files.

The "View network summary" allows you to see the number of connections, initial conditions, and parameters for each neuron within the network, while the "View network statistics" will show you the statistics associated with each of those values associated with each neuron type within the currently manipulated network.

Finally, the "Load .net file" and "Write .net file" allows you to read and write a network file into/from the Network Builder.

Below, we illustrate a practical example of how to add neurons to a network and connect the neurons using an adjacency matrix.

Using the Network Builder to add multiple neurons and connect the neurons using an adjacency matrix

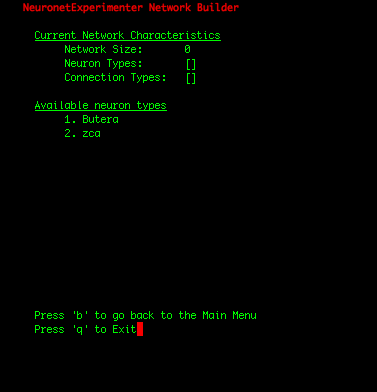
Entering the number '1' will select the "Add neurons" option and a new menu will be displayed (see below). Note, this example assumes you have built NeuronetExperimenter with Butera.oden, zca.oden, and the connectionTypes.txt file found here.
add_neurons_menu
 

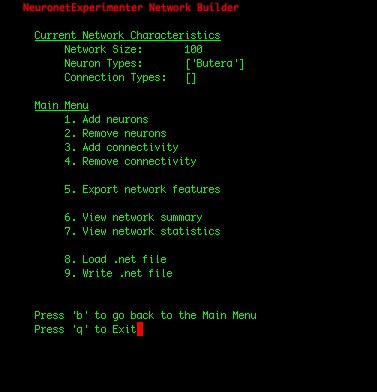
The new "Available neuron types" menu will list the model neurons that were built in the most recent binary of NeuronetExperimenter. Selecting '1' again will select the 'Butera' neurons to be added to the current network. If you type, '100' to the number of neurons field, and press [Enter], you will see the current network characteristics change to include 100 Butera neurons with an empty set of connection types:
add100ButeraNeurons

Before continuing, go ahead and add 100 more 'zca' neurons as well.

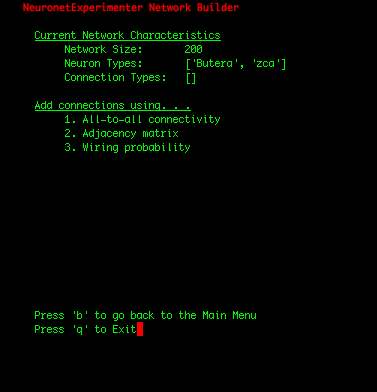
Now to add connectivity to this network, enter the number '3' into the Main Menu for "Add connectivity".

addconnectivity

By default, you can easily make networks with all-to-all connectivity (selection #1), use an adjacency matrix as input (selection #2) or add random connections with a given wiring probability (selection #3).

We will demonstrate applying the adjacency matrix found here to this network.

First, select '2' for the adjacency matrix option.

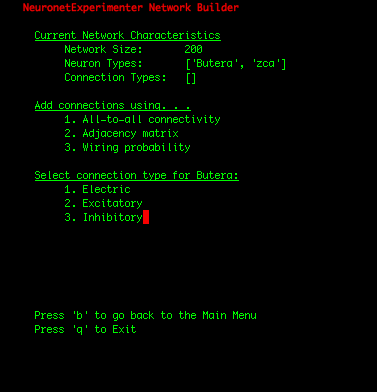
connectionsForButera
As indicated in the figure above, you can select the type of connections that the Butera neurons will make. For this example, select '2' for the Butera neurons to make 'Excitatory' connections. 
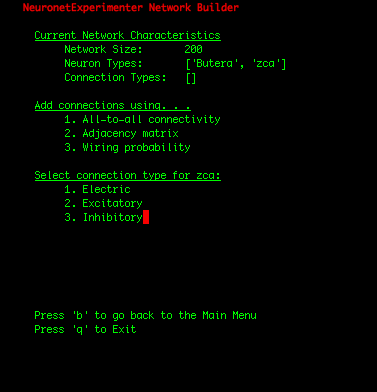
connectionsForZca
Now, you will need to specify the connection type for the zca neurons as indicated above. For this example, select '3' for the zca neurons to make 'Inhibitory' connections.

Then, you will have to specify the filename of the adjacency matrix and press [Enter] (this file should be in the directory you started 'nne_networkBuilder' from).
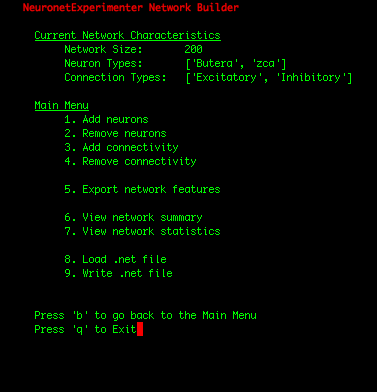
afterLoadingAdjacencyMatrix
As indicated above, you should be able to see that both Butera and zca neurons are present within the currently modified network, and the connection types within the network are made up of 'Excitatory' and 'Inhibitory" connections.

Now, we can save the network to a .net file at the Main Menu by selecting '9' for 'Write .net file'. Then type in the name of the .net file (such as "nne_networkBuilder_example.net") and pressing [Enter]. This will result in a .net file you can use in a NeuronetExperimenter simulation and should look similar to this.

IMPORTANT: Since the first 100 neurons in our network were Butera neurons and the later 100 neurons were zca neurons (which we can observe by selecting the "View network summary" option in the Main Menu), we had to construct the adjacency matrix in such a manner that assures that the first 100 rows correspond to connections FROM the Butera neurons, and the later 100 rows represent connections FROM the zca neurons. If the rows of the adjacency matrix should be mapped to the neuron types in a more complicated arrangement, one solution is to write a simple shell script that adds individual neurons to your network in the order you need them using the Utility Scripts. Or for Python programmers, the cleanest solution may be to add the neurons using the Network class in the nne.py library that the Utility Scripts themself use. Here is a simple example.

<< Main Manual